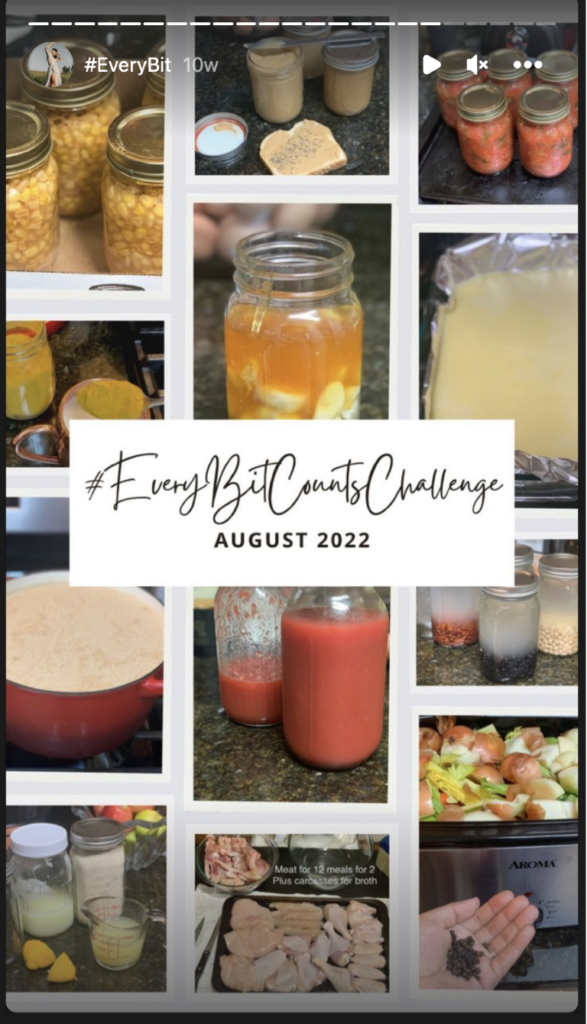
Food preservation is vital to self-sufficiency. And a properly crafted homemaking challenge can boost that for you. Here’s a recap of all we were able to accomplish by participating in the #EveryBitCountsChallenge this past summer.
This post may contain affiliate links. As an Amazon Associate I earn commissions from qualifying purchases made through links on this post at no extra cost to you. Click here to read my full disclosure.
This summer challenge was begun by Jessica @ThreeRiversHomestead. It was designed to encourage others to preserve large amounts of food in small, bite-sized tasks. The idea is that pantries can be filled with minimal stress by preserving a little each day.
Although we live in an apartment with no garden of our own we decided to participate. Read our strategic plan for success in this post. The basis though was to assess the food and items we already had in our cabinets then use local farm produce as needed to fill in gaps. Our ultimate goal wasn’t completely food preservation as most who participated. Instead, we used this homemaking challenge to increase our self-sufficiency in other ways too. So, we also focused on preserving our health and family heritage and preparing for emergencies.
When we began the challenge in August I didn’t exactly have much of a plan. And I realize now how helpful that would have been. I had a basic idea of putting some canned food away. How much was not something I thought through though.
The city-life backstory to our food preservation journey.
For those who grow their own food, it’s pretty evident what food needs to be preserved. Essentially anything you don’t consume for fresh eating. But I only knew that I wanted to start preserving food and building a pantry. All that aside, one nugget I’ve tucked away for later is this. The best food to grow is the things that your family already enjoys eating. Using that, I knew I wanted to preserve tomato products, meats and convenience meals.
I also wanted to focus on preserving what’s in season. The book Animal, Vegetable, Miracle by Barbara Kingsolver encouraged me to not only eat locally as much as possible but to eat what’s in season too. The difficulty of doing that in the USA is most foods are imported. Food is even carted across America from the West Coast to the East Coast. That’s convenient but not necessarily the healthiest. So, I challenged myself to try changing my family’s source of food. Trading conventional for local and seasonal.
Based on what we already had in the apartment, I needed to preserve some dry beans, peanuts, raw cow’s milk and bone broth. Coincidentally, the bulk beef we ordered in the spring from a local farm arrived at the start of the challenge. Additionally, we had 2 whole chickens to preserve.
Beyond that, I wanted to get a jump start on cold/flu season by preparing some home remedies like tonics and cough syrups.
There seemed to be so much to take on at the beginning of this challenge. So I’m glad we had a whole month to complete it. I also considered the preservation methods available to me. They were freezing, freeze drying, fermenting, canning and dry storage in mylar bags.
So, what did we actually accomplish?

Because the basis of the #EveryBitCountsChallenge is food preservation, I’ll start there.
Chicken Preservation
We processed the 2 whole chickens into pieces – a feat we never tried before. I learned how from a YouTube video by Pam @RoseRedHomestead. As a side note, she has a very helpful free PDF booklet that includes suggested recipes also. From that, I froze the following items:
- 2 bags of breasts (2 each)
- 1 bag of thighs
- 1 bag of chicken tenders
- 1 bag of drumsticks and
- 1 bag of wing pieces (8 total)
We also used the carcasses to make broth. It simmered with some veggies and aromatics for a few hours on the stove. That yielded just under 6 cups of broth. I kept this in the fridge and used as needed for making pasta, rice and soups.
In addition to that, we had 10 chicken necks/backs, 24 chicken feet and 12 chicken heads in the freezer to make bone broth. So, we put that in my 22QT electric roaster with veggies and aromatics too. That ran for about 48hrs before we chilled, defatted and freeze dried* it.
After drying, I crushed it into powder using my food processor and store in glass jars with oxygen absorbers. We ended up with 1 gallon of chicken bone broth powder that we use as bouillon.
*We bought a freeze dryer for home use to preserve breastmilk after our son was born. But now, we use it for a lot more! Read about our experience with the freeze dryer here.
Beef Preservation
We began purchasing bulk local grass-fed and finished beef last year. But not focusing on varied food preservation methods, most of it was tucked away in the freezer. So, with this challenge we began preserving it in different ways. We preserved ~22lb of ground beef, 30lb of beef bones and 10lb of suet.
The ground beef was canned this way:
- 12lb as 12 pints of taco meat and 5 pints plain.
- 9-10lb as chili (using the Ball Complete Book of Home Preserving recipe)
We roasted the bones (in 2 batches) and made 85 cups of delicious, nutrient-dense bone broth. This process took several days as each batch of bones roasted with veggies and aromatics for roughly 48hrs first. Then over 1-2 days, it chilled in the fridge to easily defat them. After that, each batch took 2-3 days in the freeze dryer. We powdered it in the food processor and stored in glass jars with oxygen absorbers. The result of all that effort was 2 gallons of powdered beef bone broth which we use as bouillon.
I learned to render suet into tallow as part of this challenge. We bought the suet with our bulk beef order because I knew it could be rendered and used for many things. I just didn’t know how or where to start. It’s actually very easy though!
The 10lbs of suet became 2 – 9×13 pans of beautiful tallow. I chopped one pan into cubes and froze it in quart bags to use for cooking. The second pan was eventually melted down into 3 x 16oz candles that we added to our emergency prep kit.
If you’re interested in a project like this, I followed guidance from articles I found online and Jessica @ThreeRiversHomestead and Jill Winger from @ThePrairieHomestead.
Produce & Misc. Preservation
Produce was the largest category of food preservation for us. We canned the following items:
- 4 x half-pints pickled red onions
- 2 pints peach slices
- 5 pints sweet corn (which I had to learn to shuck)
- 5 pints of homemade salsa
- 9 x half-pints grape jelly
But in addition to this, we preserved some miscellaneous items too.
- From 5lb of shelled peanuts, we made 2 pints of regular creamy peanut butter and 1 pint of honey roasted peanut butter.
- We canned 13 quarts of various dried beans (black, pinto and kidney)
- We made many batches (1QT each) of cinnamon applesauce for my baby boy
- Made 1 quart of apple scrap vinegar
- Multiple batches (5 cups each) of raw cow’s milk yogurt
- 1 pint of ground oats for baby’s cereal
- 1 quart of ready made waffle mix
The second area I focused on was preserving my family’s health and heritage. And preserving certain foods comes in handy for health purposes.
Our Health
Disclaimer: I am not a medical professional. All the information here is based on my own experience and research. You should do your own research and speak with your doctor about any concerns you have related to pregnancy, labor and delivery and recovery.
As part of the plan to prepare for cold/flu season, we made a few things.

Easy Health Tonics to Drink
Food preservation helps eliminate waste. So, I was very excited to use the last of my lemons to make lacto fermented lemonade! This delicious probiotic lemonade recipe comes from LearningandYearning.com. I made 1 quart and it did not last long at all! The probiotics came from whey I scooped off some homemade yogurt. So, if you’re looking for ways to use your whey, you have to try this!
We batched 2 cups of golden milk powder. The primary component in this is turmeric which is great for inflammation. It helps with bodily aches and pains and is antimicrobial. The powder also has cinnamon, ginger and pepper. These spices are wonderful tonic herbs with some anti-fungal and anti-bacterial properties. They help open the sinuses. And the pepper helps the body absorb the turmeric.
We enjoy it by adding a tablespoon or two to a glass of warm milk for a rich and comforting drink. Any type of milk can be used though we prefer raw cow or goat’s milk. This combination makes a superb immune boosting drink. The amount of powder determines how strong or mild the drink is. It’s always a welcome and timely addition to our regimen when we feel under the weather. But the best part of this tonic is its use as preventative maintenance.
Preserving food like Elderberry Tonics for Stronger Immune Response
Additionally, we preserved some homegrown elderberries from a childhood friend two ways. Elderberry syrup and elderberry oxymel.
I followed an elderberry syrup recipe from my childhood friend’s mom. But added ground cinnamon and ginger (though fresh was preferred). Their powers bring extra benefits to an already powerful medicinal. The elderberry juice was extracted by boiling dried elderberries in water then straining until there was enough to use. It was then sweetened with raw honey.
We made 1 quart of syrup which we store in the refrigerator. But only taking small shots (even almost) daily, should help it last a while. When we feel something coming on, we take a few extra tablespoons throughout the day to cut any bugs short quickly!
Prior to the challenge, I learned about oxymels. They are a mixture of honey and vinegar that make effective expectorants. Fruits can be added for additional medicinal purposes. So, I was excited to try making one. For ours, we used a 1:1:1 ratio of raw honey, apple cider vinegar and elderberry juice. I followed the Practical Self-Reliance recipe for an oxymel.
The elderberry juice was made using the same extraction method described above. We made nearly 1 pint of the oxymel. It remains in the cabinet because it is shelf stable with the vinegar addition.
Between the 2 herbals, I prefer the oxymel because the elderberry flavor is mild. Mr. Traditional prefers the syrup although he did let me know he really doesn’t like either! The syrup has a much stronger elderberry flavor. Nonetheless, I must say elderberry has improved my condition when I’ve taken it in the past.
Herbal Tonics made with Raw Honey
The beauty of making these herbal remedies is that we control the quality and type of ingredients. We maintain control simply by sourcing good quality items (or growing them ourselves eventually). Additionally, we have the benefit of being able to take this medicine as we need to without fear of dangerous adverse reactions*. This is truly self-sufficient, traditional living.
*Due to the honey content of both herbals, we do not give these to our baby.
Quality honey, especially raw (unheated, unprocessed) honey, is such a wonderful immune booster on its own. And a formidable opponent to foreign invaders when paired with other great foods like garlic or onions.
So, we did just that. We made 2 more herbals great for everyday maintenance or when illnesses strike.
Fermented garlic honey and honey-onion syrup are both wonderful for coughs, thinning mucus and soothing scratchy throats.
We made 1 quart of fermented garlic honey by submerging ~30 peeled garlic cloves in enough raw honey to cover. This sat in the cabinet for 4 weeks but has been stored at room temp since. For the honey onion syrup, I followed Rosemary Gladstar’s honey-onion syrup recipe. I made ~1 quart by steeping 2 sliced onions in pot with enough raw honey to cover.
We enjoy them both by adding it to warm water or teas. The garlic-honey has a stronger, unmistakeable flavor. The onion-honey though has a very mild onion flavor.
The last health tonic we made was fermented beet kvass. It is very beneficial for cleansing the blood. And it aids in digestion and supports the overall immune system. This is one of Mr. Traditional’s favorite health drinks to make at home. And it’s so easy! He adopted the recipe from the Nourishing Traditions book by Sally Fallon. Because he brews the beets twice, we made 1 gallon total.
This is how we prepped for emergencies as part of this homemaking challenge.
Although this isn’t a focal point of the #EveryBitCountsChallenge specifically, the present time is always a good time to prepare for the unexpected. From 5lb of the rendered tallow, I made 3 x 16oz emergency candles simply by adding beeswax wicks.
We also purchased a homeopathic home kit. It contains 25 homeopathic remedies for 22 of the most common ailments. And it has already come in use for my baby’s earaches as he teethes. These remedies are safe to use as directed, but do have expiration dates. So, they will need to be replaced over time if not used.
Here’s the takeaway for the next time we join a food preservation homemaking challenge…
Completing the challenge was a success. Despite not growing anything ourselves. Making use of farmers markets, local butchers and what we already had on hand was important. But not being afraid to tackle new things was key.
Prior to starting the challenge, we had never pressure canned anything, shucked corn, processed chicken or made homemade salsa or peanut butter before. But all of it was possible because we chose to learn a new skill. And those skills will be invaluable to us.
The takeaway for next year is to plan our food preservation strategy out methodically.
There were a few days where the workload required marathon batching. Not exactly the intent of this particular challenge. But we were faced with limited fridge and freezer space. So next time, I plan to stagger tasks rather than overlap.
I also realize that a solid food preservation plan estimates a certain number of jars or bags of food items. I had no idea how much of an item we wanted or needed to preserve. And I still don’t. While my long-term dream is building a 1-year pantry, it’s not realistic in this apartment right now. So, I’m working through what that looks like instead.
Knowing how many jars or bags of food we need would also help us determine how much food we need to purchase – whether in bulk or from the market. This also helps plan the number of jars we’ll need too. But I suspect that our jar accumulation will grow substantially as we continuously can food and make herbals.
When it came to canning, another variable was not having tried the recipes we used. So, rather than make large batches of things and struggle to eat it later, we kept to small batches. Hopefully we’ll gain some insight as we eat through some of our stock throughout the year.
My proudest moment in the month was knowing that we can learn new skills. We can do hard things. And we can teach our child/ren along the way. This is what self-sufficiency looks like. This is what becoming traditional feels like. The #EveryBitCountsChallenge is a mindset. So, I will be taking steps each month to preserve something because it doesn’t stop here. And of course, I’ll be participating next year too.

Part 1

Part 2

Part 3
You can stay up to date with all the happenings of this apartment-homestead by following us on IG @BecomingTraditional. And get connected with other like-minded women in the Village by joining the Becoming Traditional FaceBook group!
This post may contain affiliate links. As an Amazon Associate I earn commissions from qualifying purchases made through links on this post at no extra cost to you. Click here to read my full disclosure.
the Village Reservoir
Your one stop shop for all the great resources recommended in this post.
- Village Posts:
- Virtual Resources:
- Rose Red Homestead YouTube Channel video about turning 2 whole chickens into 12 meals for 2 people
- Jill Winger’s blogpost on Rendering Tallow
- Jessica @ThreeRiversHomestead video on rendering tallow
- Practical Self-Reliance Elderberry Oxymel recipe
- Rosemary Gladstar’s honey-onion cough syrup recipe
- LearningandYearning.com Probiotic Lacto-fermented Lemonade recipe
- Reading Material:

Leave a Reply